 |
|
|
 |
Software Documentation
- About Design Tool
- Release Notes
- Installation
- Operation
Download
Project Documentation

Operation
This section describes how to use the recommended Design Tool software packages to produce specific PDS product label schemas, which can then be used to generate product labels. In PDS4, product label schemas must conform to the XML Schema standard. The following diagram details the product label schema lifecycle:
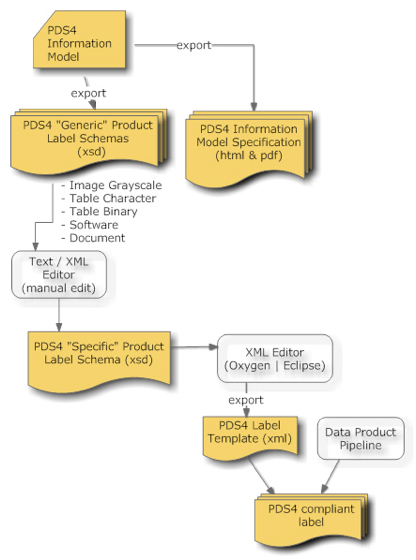
As depicted in the diagram above, generic product schemas are derived from the information model. These schemas can be used as templates for defining new products via specific schemas. The steps detailed in this section for producing a specific product label schema follow the steps (pretty closely) defined in section 6.0 - PDS4 Product Label Schema of the Data Providers' Handbook. In this section the steps have been boiled down to the following:
Select Generic Schema
The first step is to select a generic product schema from the repository. The repository is located at http://pds.nasa.gov/schema/pds4/generic/common/. Generic schemas are available for several products (e.g., Grayscale Image, Character Table, etc.). Select the appropriate schema that corresponds with the data product to be described. In addition, download any ancillary schemas (e.g., base types, extended types, etc.) are are included in the selected generic schema. For this example, the following schemas should be downloaded:
Copy Schema
The next step is to make a copy of the generic schema so that it can be tailored into a specific schema. This can be accomplished via the operating system (e.g., cp …) or via your XML Editor of choice. For this example, the Product_Table_Character_0111c.xsd is renamed to My_Product_Table_Character_0111c.xsd.
Tailor Schema
The next step involves tailoring the newly named specific schema. Options for tailoring include:
- Add data object definition(s) from building block schemas.
- Restrict valid values and optional references where appropriate.
- Restrict a value set for appropriate keywords.
- Restrict a value range for appropriate keywords.
- Removing optional references (e.g. Object_Statistics_Type). Additional examples can be found in the Data Providers' Handbook.
- Incorporate Node or Mission-specific content, which can be accomplished by referencing Node or Mission-specific schemas.
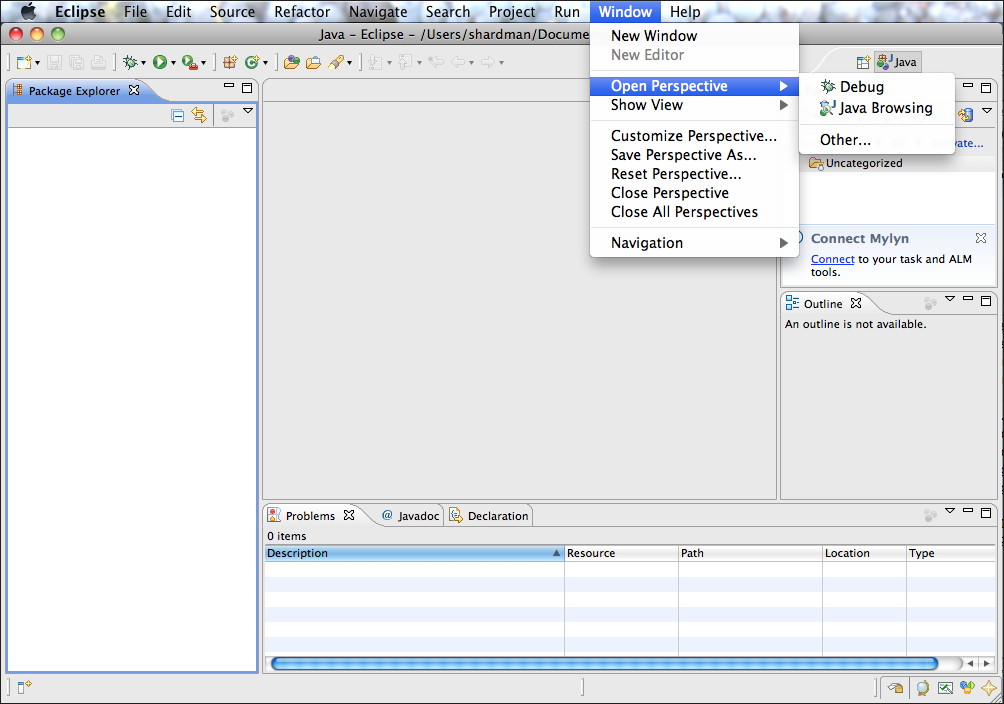
Launch your XML Editor of choice. If using Eclipse, you should first change to the XML perspective:
| Eclipse Change Perspective - Menu | Eclipse Change Perspective - Selection |
 |
 |
| If viewing this document in online form, click the images for a larger version. | |
Select the Other... menu item and then XML from the resulting list to enter the XML perspective.
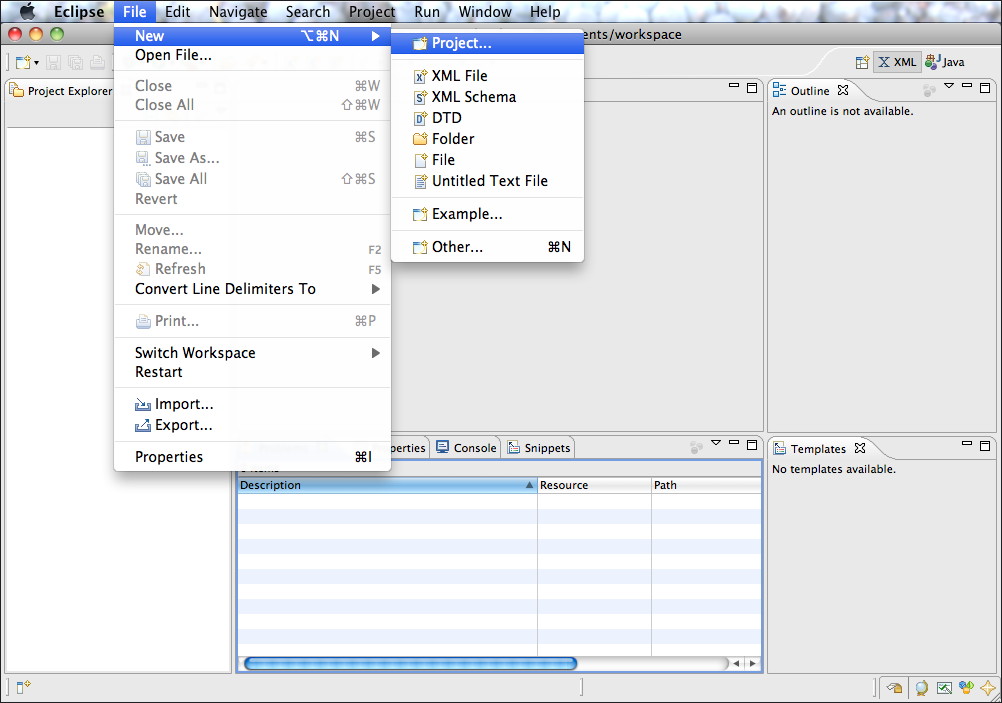
Create Project
Create a new project for managing the specific schema tailoring. In Eclipse, navigate to the File menu, select the New menu item followed by the Project... menu item as follows:
| Eclipse Create Project - Menu | Eclipse Create Project - Selection |
 |
 |
| If viewing this document in online form, click the images for a larger version. | |
Select the Project item from the list on the New Project popup window and then select the Next button. Enter a name for the project and select the Finish button to create the project.
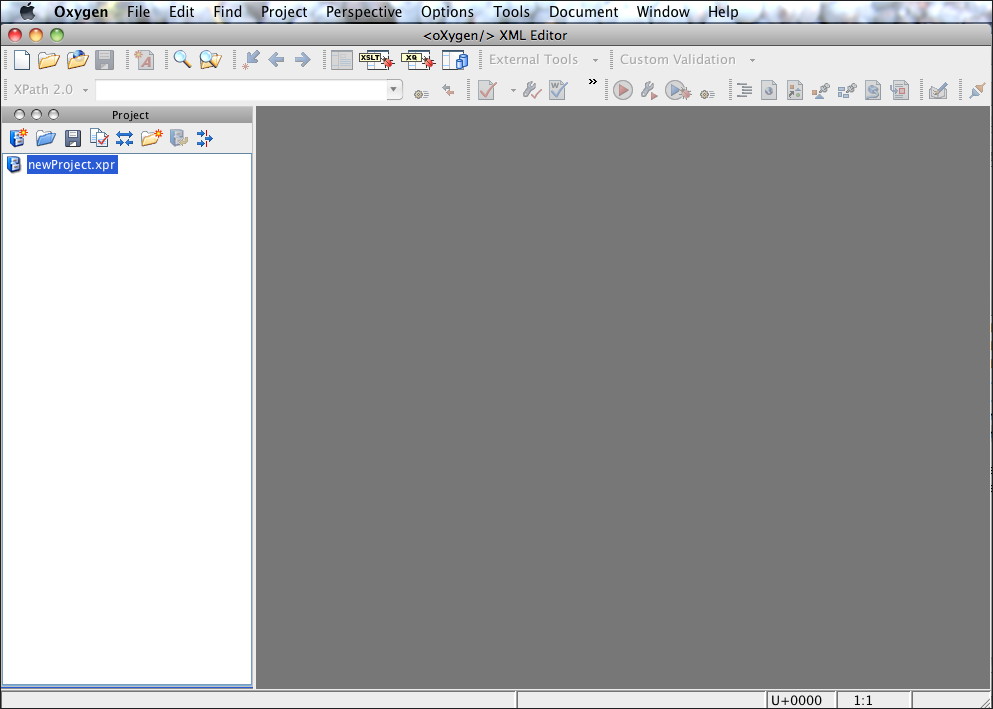
Although Eclipse prompts the user for a project name, Oxygen defaults to newProject. In Oxygen, the project can be named later using the Save As feature. In Oxygen, navigate to the Project menu, select the New Project menu item as follows:
| Oxygen Create Project - Menu | Oxygen Create Project - Result |
 |
 |
| If viewing this document in online form, click the images for a larger version. | |
Load Schemas
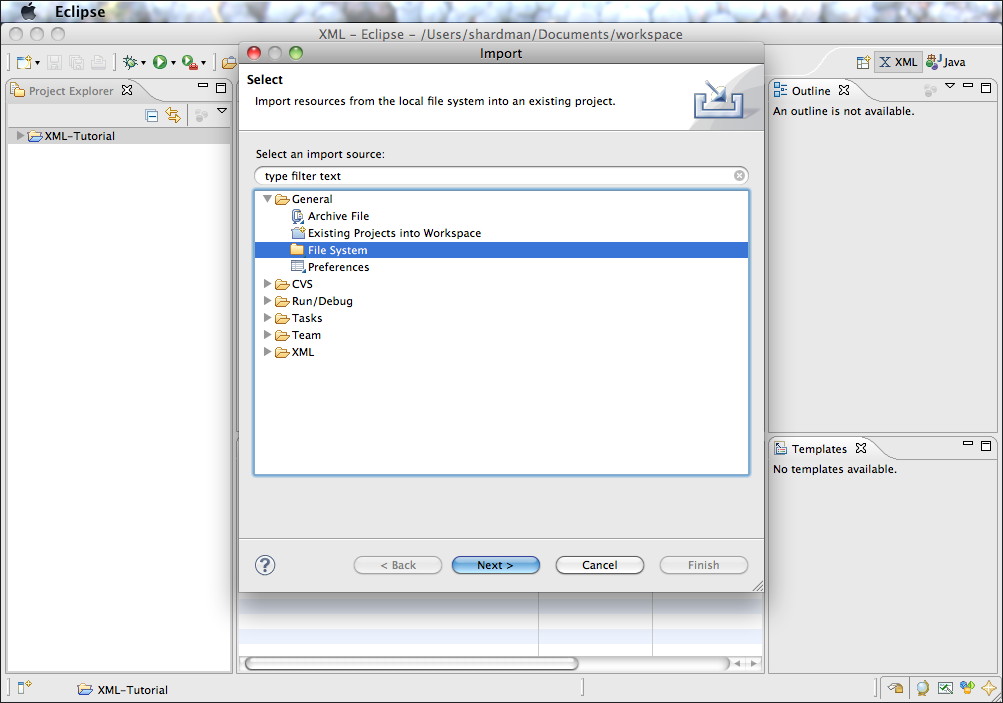
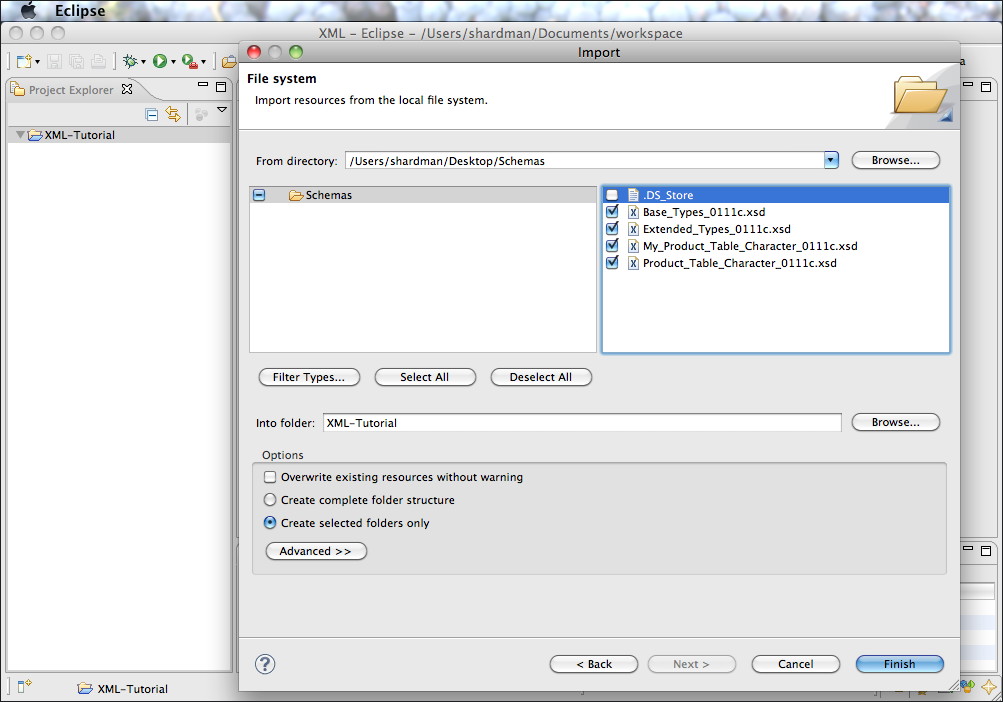
Load the schema files into the project. In both applications, the user can drag-and-drop the files into the project list. The alternative in Eclipse, is to right-click the project name from the project list and select the Import… menu item as follows:
| Eclipse Load Schemas - Menu | Eclipse Load Schemas - Type Selection | Eclipse Load Schemas - File Selection |
 |
 |
 |
| If viewing this document in online form, click the images for a larger version. | ||
Select the File System item from the list in the Import popup window and then select the Next button. Specify the target schemas for import and then select the Finish button to import the schemas into the project.
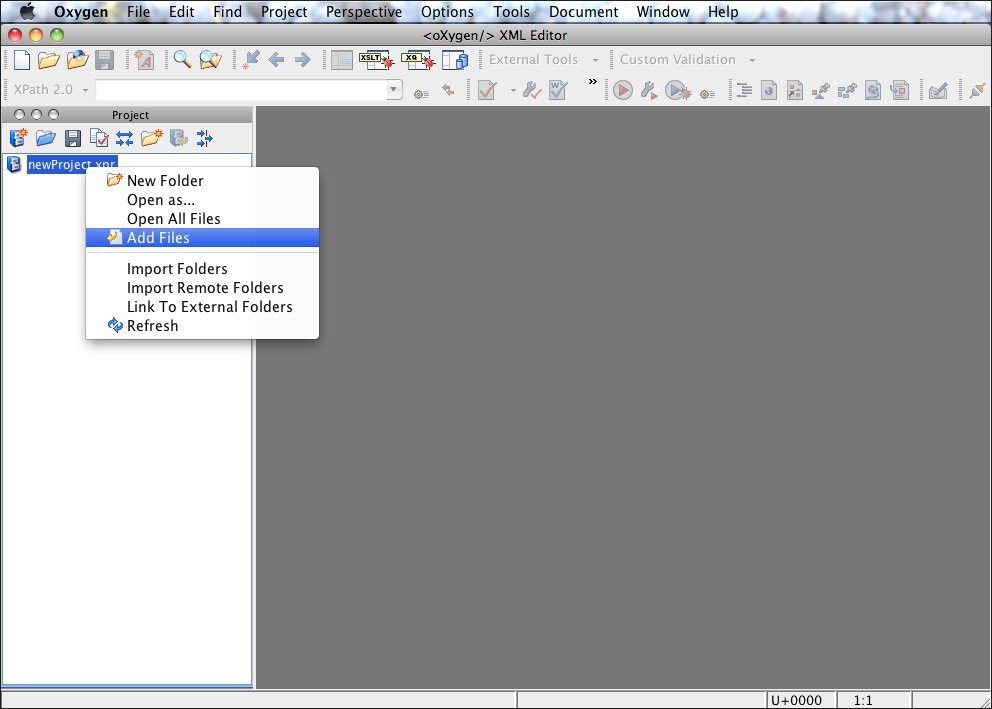
In Oxygen, right-click the project name from the project list and select the Add Files menu item as follows:
| Oxygen Load Schemas - Menu | Oxygen Load Schemas - File Selection |
 |
 |
| If viewing this document in online form, click the images for a larger version. | |
Specify the target schemas, one by one, for import and then select the Open button to import each schema into the project.
Modify Schema
Open the My_Product_Table_Character_0111c.xsd schema file by double-clicking the file name from the project file list or navigating to the File menu and selecting the Open... menu item. In Eclipse, change from Design view to Source view. In Oxygen, change from Schema view to Text view.
Now that the file is open, the first modification is to change the name within the schema to correspond with the file name change. Find instances of Product_Table_Character and replace them with My_Product_Table_Character. In Eclipse, navigate to the Edit menu and select the Find/Replace... menu item. In Oxygen, navigate to the Find menu and select the Find/Replace... menu item.
This is where the assorted modifications listed at the beginning of this section can be made.
Validate Schema
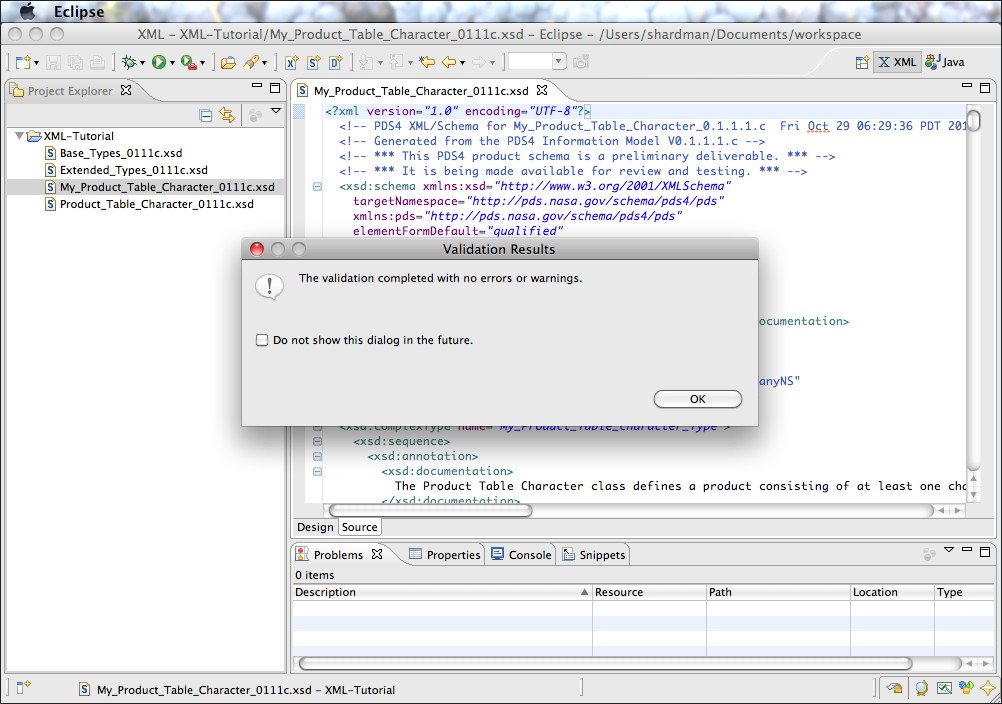
Although both applications notify the user real-time when the active schema file is not valid, the schema can be validated using the XML Editor’s validate feature. Example errors could include typos or non-XML conformant entries or missing element definitions. In order to initiate validation, right-click the file name from the project file list and select the Validate or Validate Selection menu item in Eclipse and Oxygen, respectively. In Eclipse, the pulldown menu and resulting window are as follows:
| Eclipse Validate Schema - Menu | Eclipse Validate Schema - Result |
 |
 |
| If viewing this document in online form, click the images for a larger version. | |
In Oxygen, the pulldown menu and resulting window are as follows:
| Oxygen Validate Schema - Menu | Oxygen Validate Schema - Result |
 |
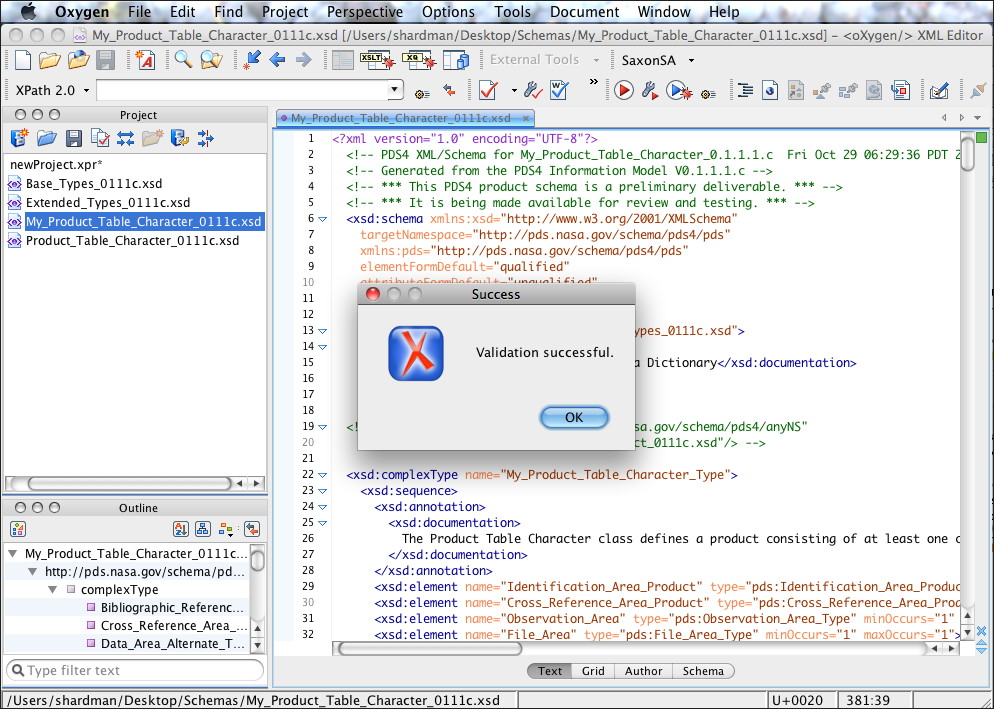 |
| If viewing this document in online form, click the images for a larger version. | |
After a few or many iterations of modifying the specific schema, save the completed specific schema.
Create Sample Label
Create a sample label in XML from the tailored specific schema. In Eclipse, right-click the file name from the project list and select the Generate->XML File … menu item as follows:
| Eclipse Create Label - Menu | Eclipse Create Label - Option Selection |
 |
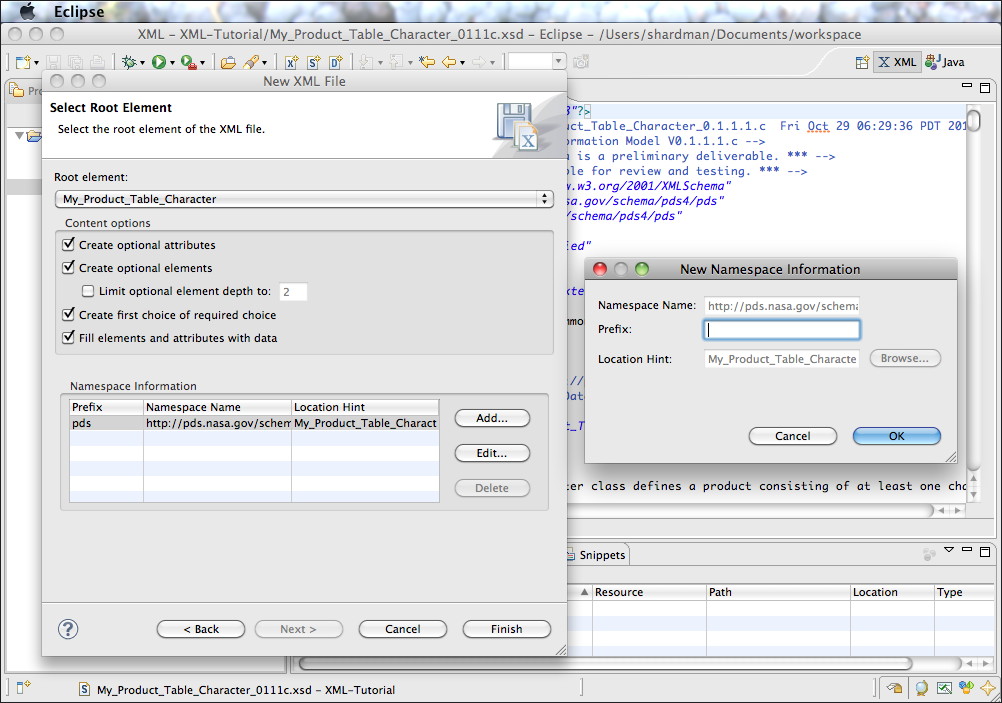 |
| If viewing this document in online form, click the images for a larger version. | |
Select the Create optional attributes and Create optional elements check boxes on the New XML File popup window. In addition, edit the namespace entry and blank out the prefix for the namespace. Select the OK button in the New Namespace Information popup window and then select the Finish button on the New XML File popup window to generate the sample label.
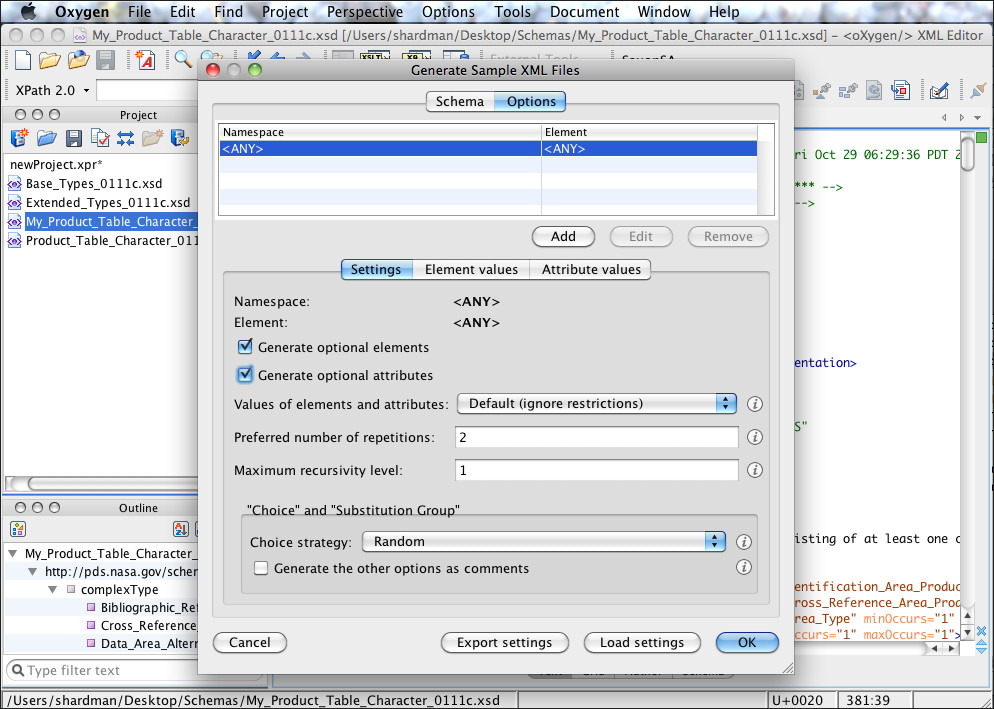
In Oxygen, right-click the file name from the project list and select the Generate Sample XML Files… menu item as follows:
| Oxygen Create Label - Menu | Oxygen Create Label - Option Selection | Oxygen Create Label - More Options |
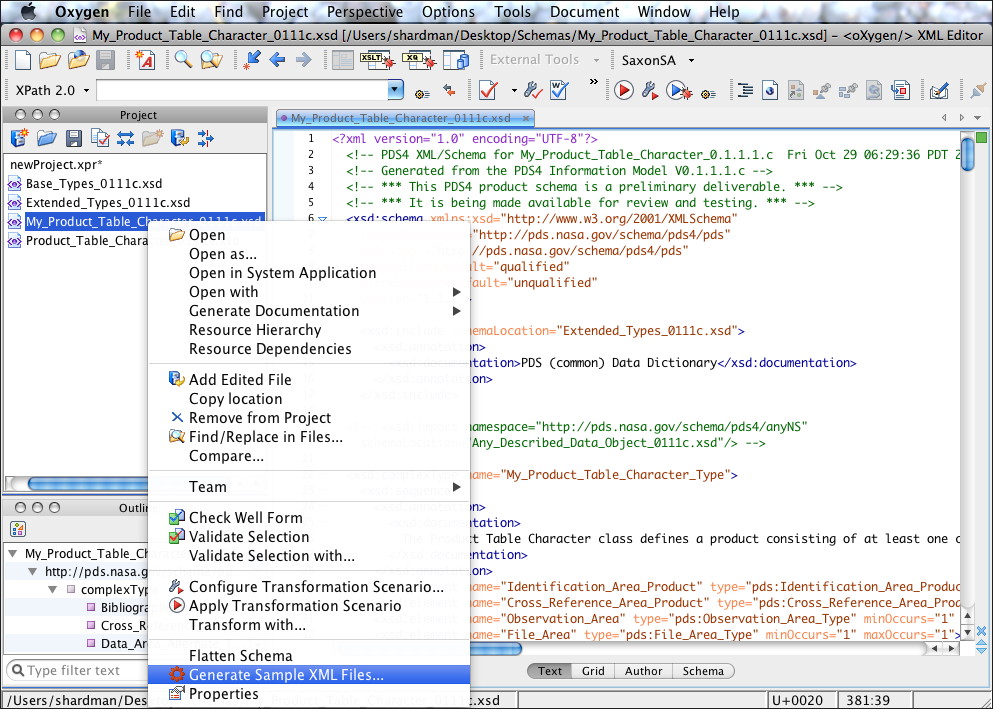 |
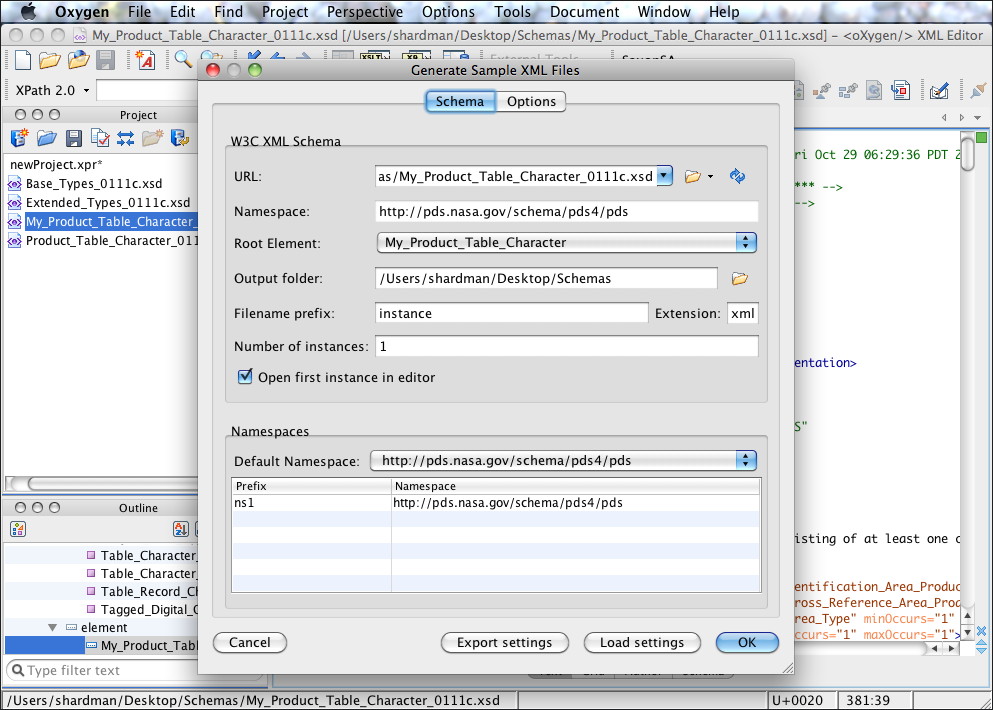 |
 |
| If viewing this document in online form, click the images for a larger version. | ||
Select the OPTIONS tab on the Generate Sample XML Files popup window and then select the Generate optional elements and Generate optional attributes check boxes. Select the OK button to generate the sample label.
The generated XML sample label is conformant with the My_Product_Table_Character_0111c.xsd schema.
 |
|
 |
|